
Microneedling for acne scars is a clever technique that taps into your skin’s own healing powers to smooth out old scars. By creating tiny, controlled micro-injuries in the skin, the procedure kick-starts the production of new collagen and elastin, which helps repair and rebuild the skin from the inside out.
How Microneedling Transforms Acne Scars
Acne scars can be a frustrating, stubborn reminder of past breakouts, leaving behind an uneven texture that makeup struggles to conceal. Microneedling, also known as collagen induction therapy, offers a powerful way to address this by essentially waking up your skin’s natural ability to heal itself.
Think of it this way: if your skin is a lawn with patches of hard, compacted soil, microneedling acts like an aerator. It creates tiny, invisible channels that break up that old, tough tissue. This isn’t about causing damage; it’s about sending a precise signal to your body that it’s time to get to work repairing the area.
This controlled “injury” sets off a healing cascade. Your body rushes growth factors to the site, which in turn ramps up the production of new collagen and elastin—the very proteins that give your skin its structure, firmness, and smooth appearance.
The Repair Process in Action
As this fresh collagen matrix begins to form, it works from the foundation up. It starts to fill in the depressed, pitted areas typical of atrophic scars (like boxcar and rolling scars) and helps remodel the rigid, fibrous tissue that causes uneven texture.
This regenerative process is what makes microneedling for acne scars so effective. While topical creams work on the surface, microneedling rebuilds the skin’s underlying support structure.
Microneedling doesn’t just cover up the problem—it encourages your skin to build new, healthy tissue, leading to a genuine and lasting improvement in texture and tone.
This minimally invasive approach is also what sets it apart from more aggressive treatments. There’s no harsh removal of the top layer of skin, which usually means less downtime and a lower risk of side effects, making it a great option for a wide variety of skin tones.
Microneedling for Acne Scars at a Glance
To give you a clearer picture, this table breaks down the key aspects of the treatment.
| Aspect | Description |
|---|---|
| Primary Goal | To stimulate new collagen and elastin production to fill and smooth acne scars. |
| Ideal for | Atrophic scars (pitted, rolling, boxcar), uneven skin texture, and some forms of hyperpigmentation. |
| Procedure Time | Approximately 60 minutes per session, including prep and numbing. |
| Typical Downtime | 1 to 3 days of mild redness and swelling, often compared to a sunburn. |
| Number of Sessions | A series of 3-6 treatments, spaced 4-6 weeks apart, is typically recommended for best results. |
| Results Timeline | You may see initial improvements in a few weeks, but the full effects appear over several months as collagen continues to build. |
This table provides a snapshot of what to expect, but the growing popularity of microneedling speaks for itself. The global microneedling market was valued at around $472.34 million in 2020 and is on track to hit $650 million by 2025.
This boom is driven by a growing demand for effective, minimally invasive cosmetic procedures. To see how it fits into the bigger picture, you can explore other strategies for healing acne scars. Ultimately, this trend shows people want real results without the lengthy recovery times of older methods.
The Science of Rebuilding Your Skin
To really get how microneedling works on acne scars, we have to look deeper than the surface. The magic isn’t about the tool itself; it’s about the powerful, three-stage healing process it kicks off inside your skin. This isn’t some harsh overhaul—it’s more like a precise wake-up call for your body’s own repair crew.
This infographic breaks down the fundamental process from start to finish.
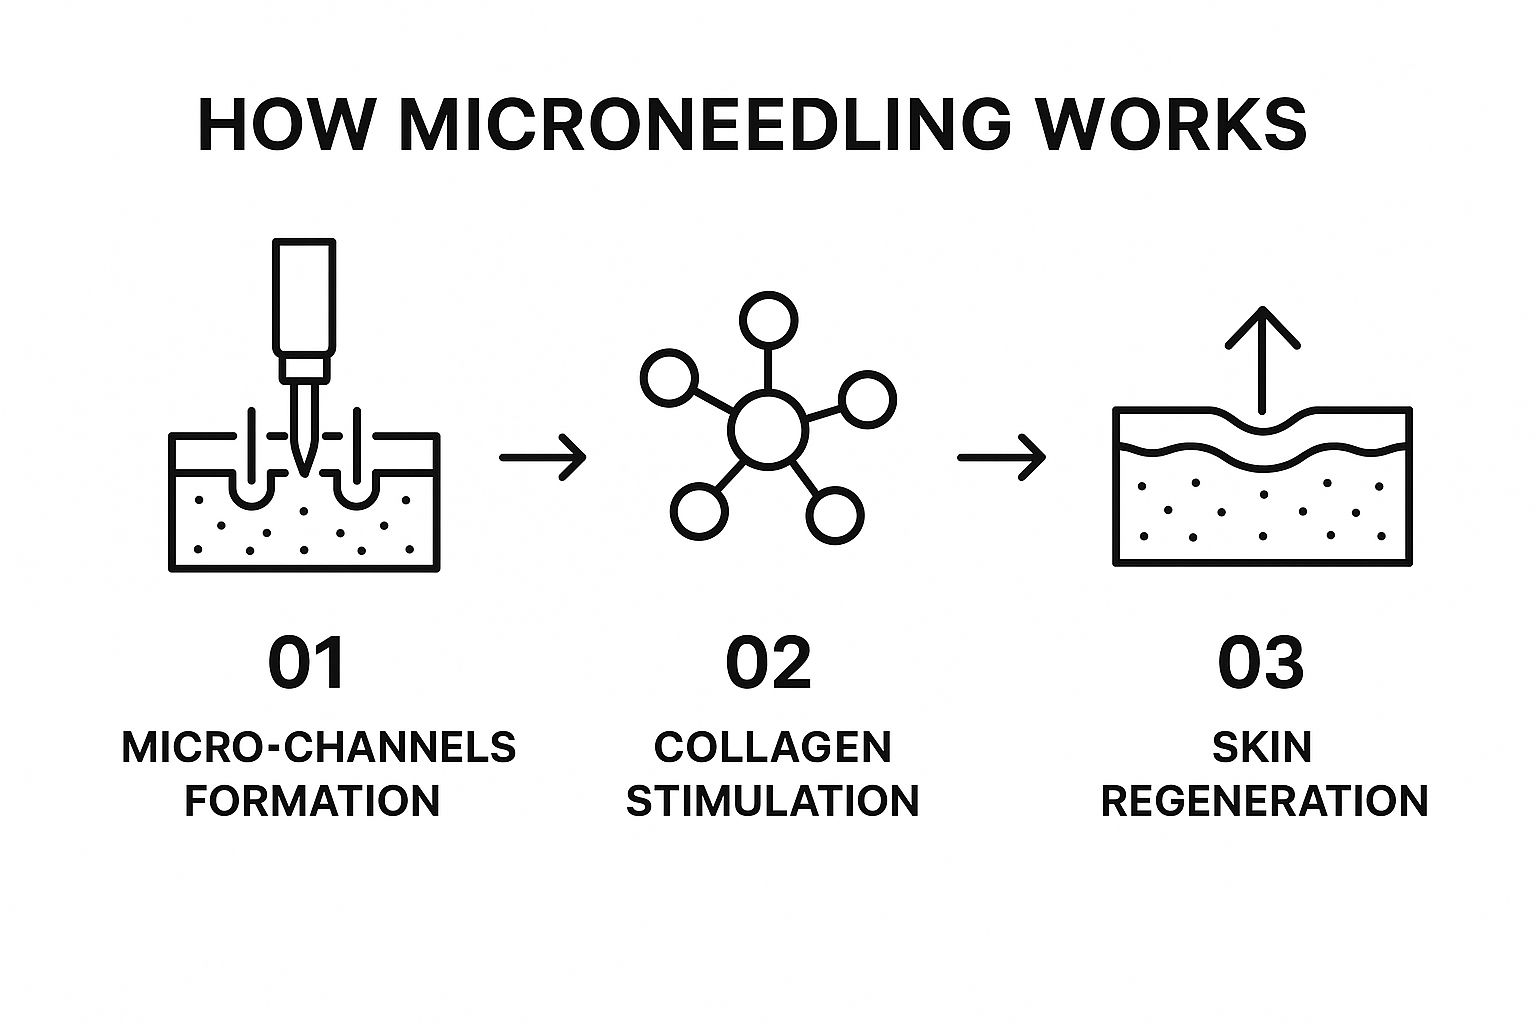
From the first micro-channels to the final regeneration, every step builds on the last to give you smoother, healthier-looking skin.
Phase 1: The Inflammation Response
The moment those tiny needles create micro-channels in your skin, your immune system snaps to attention. You can think of this first stage as the “demolition crew” showing up at a construction site. This controlled inflammation is absolutely essential for clearing out old, damaged cells and the tough, disorganized collagen fibers that form scar tissue.
This immediate reaction boosts blood flow to the area, which delivers critical nutrients and signals growth factors to get the repair process started. It might sound a bit backward, but this carefully managed inflammation is the first—and most important—step toward rebuilding smoother skin.
Phase 2: The Proliferation of New Tissue
Right after the initial clean-up, the second phase gets underway. This is the “construction” stage, where your skin begins laying down a brand-new foundation. Specialized cells called fibroblasts are activated and get to work.
These fibroblasts are like microscopic weavers, spinning a fresh matrix of flexible, healthy collagen and elastin. This is the new tissue that starts filling in the depressions of atrophic scars, like boxcar or rolling scars. The micro-injuries basically tell your body to produce more collagen and elastin, the key building blocks for supple, healthy skin. If you’re curious about how these proteins work, you can read more about the benefits of multi collagen peptides.
This phase is where the real transformation begins. Instead of just patching over the scar, your skin is actively creating new, high-quality tissue from the ground up, leading to a visible change in texture and depth.
And for those with raised, or hypertrophic, scars? This process helps break down the lumpy, excess collagen, allowing a flatter, more uniform skin surface to form in its place.
Phase 3: The Remodeling and Maturation
The last stage is all about refining and strengthening the newly built tissue. This “remodeling” phase can actually continue for months after your last treatment. Over this time, the new Type III collagen fibers are gradually replaced by stronger, more organized Type I fibers—the kind you find in healthy, youthful skin.
This reorganization is what creates that long-lasting smoothness and improved texture. Your skin becomes firmer, the scars get shallower, and your overall complexion looks more even and resilient. It’s a slow and steady process, but it’s what ensures the results aren’t just a temporary fix but are actually integrated into your skin’s structure.
Customizing Treatment for Different Scar Types
Not all acne scars are created equal, which is exactly why getting this done by a professional is so important. A skilled aesthetician will adjust the microneedling depth to target your specific scar types safely and effectively.
- Ice Pick Scars: These are deep, narrow pits that need precise, deeper needle penetration to wake up the collagen at the very base.
- Boxcar Scars: With their broader shape and sharp edges, these scars benefit from treatment that encourages widespread collagen production to lift the floor of the scar.
- Rolling Scars: These create a wavy look on the skin and are best treated by breaking up the fibrous bands underneath that are pulling the surface down.
A customized approach makes sure the stimulation is delivered exactly where it’s needed, giving you the best possible results with minimal risk. While microneedling is fantastic on its own, it’s sometimes paired with other treatments. For instance, knowing how it differs from a chemical peel for acne scars can help you and your provider build the perfect game plan for your skin. This kind of attention to detail is what separates a standard procedure from a truly corrective one.
Exploring Your Treatment Options
When you start looking into microneedling for acne scars, you’ll quickly realize it’s not a one-size-fits-all treatment. There are a few key variations, and knowing the difference is the first step toward choosing the right path for your skin. Let’s break down what’s out there.
This image shows a microneedling pen, the classic tool of the trade. It’s what professionals use to create those precise micro-channels that kickstart the skin’s renewal process.
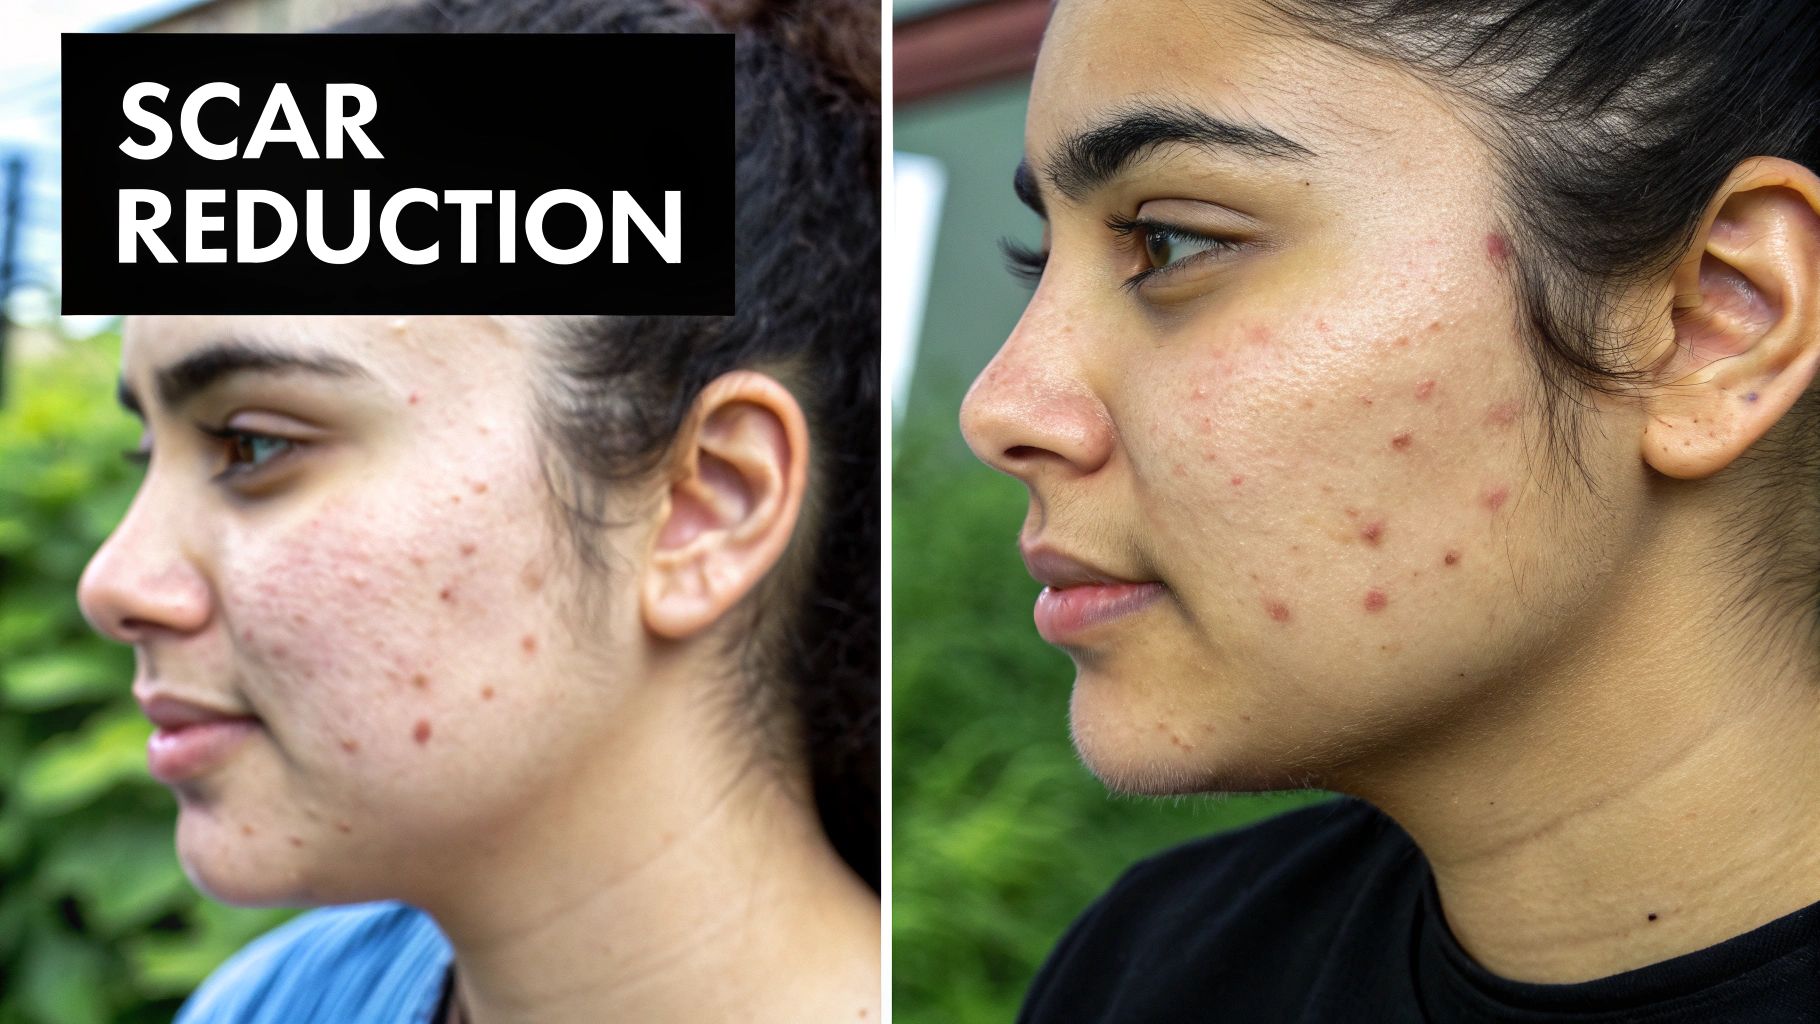
The real magic is in the pen’s adjustable needle depth, which allows a skilled technician to tailor the treatment perfectly for different scar types and areas of the face.
Traditional Microneedling: The Foundation
This is the original and most common form of microneedling. It’s done with a professional handheld device, often called a dermapen, that uses tiny, sterile needles to create controlled micro-injuries in the skin. This controlled “damage” is actually a good thing—it wakes up your body’s natural healing response, telling it to get busy producing fresh, new collagen.
This foundational method is incredibly effective for improving the texture of shallow to moderate scars, especially rolling and boxcar scars. Think of it as the tried-and-true workhorse of skin rejuvenation.
RF Microneedling: The Turbocharged Upgrade
Have more stubborn or deeper acne scars? You might want to look into Radiofrequency (RF) Microneedling. This is where we get a little more high-tech. The procedure combines traditional microneedling with the power of radiofrequency energy. As the needles enter the skin, they deliver a gentle, controlled burst of heat deep into the dermis.
That heat acts like a turbocharger for collagen production. It intensifies the body’s repair signals, leading to more dramatic collagen remodeling and a noticeable skin-tightening effect. It’s a game-changer for atrophic scars that need a real lift from beneath the surface.
Simply put, RF microneedling does two jobs at once: the needles create the physical wound to trigger collagen, and the radiofrequency adds thermal energy to stimulate it even further. This dual action is why people often see more significant and faster results.
This powerful combo is surging in popularity. In fact, its market is projected to make up 39.3% of the entire acne scar treatment segment by 2025, according to the latest market insights on RF microneedling. The growth is all thanks to its ability to deliver targeted energy for superior skin remodeling.
PRP Enhancements: The Healing Accelerator
Another fantastic way to elevate your treatment is by adding Platelet-Rich Plasma (PRP), a procedure you might have heard called the “vampire facial.” This technique harnesses the amazing healing potential found in your own blood to boost your results.
Here’s how it works:
- A small sample of your blood is drawn, just like a standard blood test.
- The vial is placed in a centrifuge, which spins it rapidly to separate and concentrate the platelets into a golden serum—that’s the PRP.
- This PRP, packed with powerful growth factors, is applied directly to your skin right after the microneedling is done.
The tiny channels created by the needles act as a direct delivery system, allowing the PRP to penetrate deep into the skin where it’s needed most. These growth factors supercharge the healing process, helping to reduce downtime and redness while seriously amplifying your final results.
Deciding between traditional, RF-enhanced, or a PRP-boosted treatment really comes down to your specific scars, skin type, and what you’re hoping to achieve. It’s important to remember that these treatments are for scars, not active acne. If you’re still dealing with breakouts, the best first step is to get them under control. An acne facial can help clear your skin and get it ready for the next phase of scar revision.
Your Microneedling Journey: A Step-by-Step Guide
Deciding to try microneedling can feel like a big step, but knowing exactly what’s involved can make all the difference. Think of it less as a daunting medical procedure and more as a well-planned path toward the smoother, clearer skin you’re hoping for.
Let’s walk through the entire experience together, from the very first conversation to what your skin will feel like right after you leave the clinic. We’ll break it down into three key stages so you know just what to expect.
Stage 1: Setting the Stage for Success (Pre-Treatment)
Your journey actually starts well before you ever lie down in the treatment chair. The first, and arguably most important, step is a detailed consultation with a qualified, licensed professional. This is your chance to talk openly about your skin’s history, the specific acne scars you want to address, and what you hope to achieve. Your provider will take a close look at your skin to make sure microneedling is the right fit for you and sketch out a personalized plan.
After that initial meeting, you’ll get a list of pre-treatment instructions. Following these is crucial—proper prep work helps minimize potential side effects and really sets you up for the best possible outcome.
Think of it like getting your garden ready for new seeds. Your skin needs to be calm and prepared to respond beautifully to the treatment. This usually involves:
- Staying out of the sun. Avoid direct sun exposure and tanning beds for at least a week beforehand. Sunburned skin is a no-go.
- Hitting pause on potent skincare. You’ll need to stop using active ingredients like retinoids (Retin-A, tretinoin) and exfoliating acids (AHAs/BHAs) for 3-5 days prior. This prevents over-sensitizing the skin.
- Waiting for clear skin. If you have an active breakout, it’s best to reschedule. Microneedling over active pimples can spread bacteria and make things worse.
Stage 2: The Main Event (Your Treatment Day)
When you walk in for your appointment, the entire focus shifts to your comfort and safety. The session always kicks off with a thorough but gentle cleanse to get rid of any makeup, oil, and grime. This creates a completely sterile surface to work on.
Next up is a topical numbing cream. It’s applied generously to the treatment area and left to work its magic for about 30-45 minutes. This ensures your skin is desensitized, making the whole process much more comfortable. Most people find the actual microneedling part to be surprisingly manageable.
People often describe the sensation as a light vibration or a feeling similar to fine-grit sandpaper gliding across the skin. It’s not exactly a massage, but it’s generally very tolerable. Your practitioner will be checking in with you the whole time to make sure you’re doing okay.
The microneedling itself is pretty quick, typically lasting only 20-30 minutes, depending on how large of an area is being treated. Your aesthetician will carefully and methodically move the device across your skin, creating those tiny micro-injuries that signal your body to start building fresh, new collagen.
Stage 3: The Afterglow (Immediately Post-Treatment)
As soon as the treatment is over, your skin will likely look and feel like you have a mild to moderate sunburn. This redness, and maybe a little bit of swelling, is totally normal. In fact, it’s a good sign! It means your body’s natural healing cascade has officially kicked off.
Before you head out, your provider will apply a calming, hydrating serum to soothe the skin. They’ll also give you specific instructions and products for your at-home aftercare routine. One of the best parts about microneedling is that there’s virtually no real downtime, so you can get back to your day. The initial redness usually calms down a lot within the first 24 to 48 hours, marking the true beginning of your skin’s renewal.
To keep things simple, here’s a quick-glance guide to help you navigate the timeline and get the most out of your treatment.
Microneedling Timeline Do’s and Don’ts
| Timeframe | What to Do (Do’s) | What to Avoid (Don’ts) |
|---|---|---|
| 1 Week Before | ✅ Stay hydrated and protect your skin with SPF. | ❌ Tanning beds or prolonged, unprotected sun exposure. |
| 3-5 Days Before | ✅ Focus on gentle cleansing and moisturizing. | ❌ Using retinoids, AHAs, BHAs, or other exfoliants. |
| 24 Hours Before | ✅ Get a good night’s sleep and arrive with clean skin. | ❌ Drinking alcohol, as it can increase inflammation. |
| The Day Of | ✅ Relax and trust your provider. | ❌ Wearing makeup or heavy lotions to your appointment. |
| First 24 Hours After | ✅ Use only the recommended aftercare products. Keep hands off! | ❌ Applying makeup, sweating excessively, or using harsh cleansers. |
| 3-5 Days After | ✅ Be gentle. Apply hyaluronic acid and a mineral-based SPF. | ❌ Direct sun exposure, swimming pools, saunas, and active skincare. |
| 1 Week After | ✅ You can slowly reintroduce your normal skincare routine. | ❌ Rushing back into retinoids or chemical exfoliants. Listen to your skin. |
Following this simple timeline helps ensure your skin heals beautifully and you get the fantastic, scar-smoothing results you’re looking for.
Your Aftercare Plan for the Best Results
The success of your microneedling treatment doesn’t end when you leave the clinic. What you do in the hours and days that follow is just as important as the procedure itself. Think of your skin as a garden bed you’ve just aerated and seeded—it needs the right care to flourish.
This aftercare phase is when your skin is in full repair mode. Sticking to a solid plan ensures it heals correctly, maximizes that precious new collagen, and helps you get the smoothest possible results for your acne scars.
Your Healing Timeline Day by Day
The first week is when most of the action happens. Knowing what to expect makes it much easier to care for your skin properly and without any guesswork.
- Day 1-2 (The “Sunburn” Phase): Right after your session, your skin will likely be red, feel a bit tight, and be warm to the touch, almost like a mild sunburn. The goal right now is simple: calm and protect.
- Day 3-5 (The Peeling Phase): As the initial redness calms down, you’ll probably notice some dryness and light flaking. Don’t worry, this is totally normal! It’s just your skin’s renewal process kicking in as it sheds old, damaged cells.
- Day 6-7 (The Recovery Phase): By the end of the first week, most of the obvious side effects should be gone. Your skin will start feeling smoother as you head toward seeing those first signs of improvement.
Nurturing Your Healing Skin
Proper care during this time is straightforward but absolutely non-negotiable. Your job is to keep your skin clean, hydrated, and protected from anything that could cause irritation.
For the first few days, your skincare routine should be stripped back to the bare essentials. We’re talking gentle, hydrating ingredients and avoiding anything that could disrupt the healing process.
Here’s what you’ll need in your post-treatment toolkit:
- A Gentle Cleanser: Use a mild, soap-free cleanser and only lukewarm water. No scrubbing or using washcloths—just your fingertips. When you’re done, gently pat your skin dry with a clean towel.
- Hydrating Serums: A good hyaluronic acid serum is your best friend right now. It pulls moisture deep into the skin, which is exactly what it needs to heal efficiently. Apply it morning and night while your skin is still slightly damp.
- Sun Protection: This is the most critical step. Your skin is incredibly vulnerable to sun damage after microneedling. You must apply a broad-spectrum, mineral-based sunscreen with at least SPF 30 every single day, even if you’re staying inside.
Long-Term Strategy for Lasting Results
While the initial healing is pretty quick, the real magic of microneedling for acne scars happens over the next few months. That collagen remodeling process continues long after the redness fades, gradually filling in scars and refining your skin’s texture.
This is exactly why a series of treatments is so powerful. Most people need between four and six sessions to see the best results. This cumulative approach can boost collagen and elastin production by up to 400%.
While sessions can range from $200 to $800, it’s an investment that pays off—over 80% of people who get the treatment recommend it for its incredible scar-remodeling benefits. You can even explore more statistics about microneedling success rates to see the data for yourself.
After about a week or two, you can typically reintroduce your regular active ingredients like retinoids or vitamin C, but always listen to your skin and follow your provider’s specific advice. From there, maintaining those results is all about a consistent daily routine and, you guessed it, more sunscreen.
Your Microneedling Questions, Answered
Taking the plunge and investing in your skin is a big step, so it’s only natural to have a few questions before committing to a treatment like microneedling. Getting a handle on the practical details—from what it feels like to the cost and how long the results last—is the best way to feel confident moving forward.
Let’s walk through some of the most common questions people have about using microneedling for acne scars. We’ll give you clear, straightforward answers to help you feel completely in the loop.
So, Does Microneedling for Acne Scars Hurt?
This is usually the first thing on everyone’s mind, and I get it. The short answer is no, it really shouldn’t be a painful experience. Before the treatment ever begins, your esthetician will apply a powerful topical numbing cream to the entire area.
This cream sits for about 30-45 minutes, giving it plenty of time to make sure your skin is properly desensitized. Once the treatment starts, most people say it feels like a light vibration or maybe a gentle scratching sensation, kind of like fine-grit sandpaper gliding across the skin. Some spots with thinner skin, like your forehead or along the jawline, might feel a tad more sensitive, but overall, the process is very easy to tolerate.
What’s the Investment? How Much Does It Cost?
The cost of microneedling can swing a bit depending on a few things. Your city, the experience level of your provider, and whether you’re adding on treatments like Radiofrequency (RF) or PRP will all play a role in the final price.
Generally, you can expect a single session of standard microneedling to fall somewhere in the $200 to $800 range.
Here’s the key thing to remember: treating acne scars isn’t a one-and-done deal. To get those smooth, lasting results, you’ll almost always need a series of treatments.
Most professionals will recommend a plan of 3 to 6 sessions, spaced about four to six weeks apart. A lot of clinics offer package deals that bring down the per-session cost, so it’s always smart to ask about your options for a full treatment plan during the consultation.
Who Is a Good Candidate for This Treatment?
One of the best things about microneedling is just how versatile it is. It’s safe and effective for a huge range of skin types and tones, which is great news for people who might not be able to get certain laser treatments that can pose a risk of hyperpigmentation for darker skin.
The ideal candidate for microneedling is someone who:
- Has atrophic acne scars (the indented kind, like boxcar, rolling, or ice pick scars).
- Is not dealing with active acne breakouts, as the treatment could spread bacteria.
- Doesn’t have any open wounds, skin infections, or inflammatory conditions like eczema or rosacea in the area being treated.
- Is not pregnant or currently breastfeeding.
A thorough chat with a licensed esthetician is essential. They’ll help you confirm if microneedling is truly the right path for your skin’s specific needs and health history.
How Many Sessions Until I See Real Results?
When it comes to building new collagen, patience is your best friend. You might notice a healthy “glow” and some small textural improvements within a week or two, but the real, deep scar remodeling happens over the following months.
The number of sessions you’ll need really comes down to the depth and type of your acne scars.
| Scar Severity | Recommended Sessions |
|---|---|
| Mild to Moderate | 3-4 sessions |
| Moderate to Severe | 5-6+ sessions |
These appointments are usually scheduled 4-6 weeks apart. That gap is there for a reason—it gives your skin the perfect amount of time to heal and kickstart its collagen-building cycle before the next round. The results are cumulative, which means every session builds on the progress of the one before it.
Are the Results from Microneedling Permanent?
For acne scars, the results you get from microneedling are considered permanent. Why? Because the treatment is fundamentally rebuilding your skin from the inside out. You’re creating brand new, healthy collagen to permanently fill in and smooth over that old scar tissue.
Now, “permanent” doesn’t mean you’re suddenly immune to the clock. Your skin will continue its natural aging process, which includes a slow-and-steady breakdown of collagen over the years. To counteract this, many people opt for a maintenance session once or twice a year to keep that collagen engine running and their skin looking refreshed.
If you have other questions popping into your head, you can always check out a more complete list by visiting our frequently asked questions page for more in-depth answers.
At Meljestic Spa, we’re here to help you get the clear, confident skin you deserve. Our team specializes in creating personalized microneedling plans that work, all in a safe and comfortable setting. If you’re ready to start your journey to smoother skin, book your complimentary consultation with us today. Learn more at https://meljesticspa.com.


